How to Make a DIY Genealogy Book as a Treasured Family Gift

Post Preview
Preserving family history is a meaningful way to honor your roots and create something that future generations will cherish. A DIY genealogy book is more than just a gift—it’s a legacy, capturing the stories, milestones, and connections that define your family. Whether for a reunion, holiday, or personal project, crafting a genealogy book can be a deeply rewarding experience.
Here’s how to bring your family history to life.
Collecting Family History
Gathering Information
The foundation of any great genealogy book is thorough research. Start by speaking with relatives—grandparents, parents, and extended family members—and recording their memories. These conversations often reveal hidden stories and details that might not be found anywhere else.
Next, dive into old documents like birth certificates, marriage records, and family letters, as they provide crucial historical context. Don’t forget to include photographs and other analog media. Many families have stacks of photo albums, negatives, or even 35mm slides tucked away in storage. By converting 35mm slides to digital, you can protect these precious memories from deterioration and easily incorporate them into your genealogy book. Using professional scanning services or digitization tools ensures your memories are preserved for future generations.
Using Digital Tools
Digital tools make organizing and preserving family history easier than ever. Genealogy software can help you map out family trees, while apps and online platforms let you categorize photos, documents, and stories. Going digital also ensures your work is future-proof and easy to share with other family members.
Organizing the Genealogy Book
With the information gathered, it’s time to structure your book. Start with a family tree, visually representing relationships across generations. Then, create sections dedicated to individual family members or branches.
Consider including a timeline of major family milestones alongside broader historical events that influenced their lives, such as migrations, wars, or cultural shifts. This context makes your genealogy book richer and more engaging.
Adding Personal Touches
Infuse your genealogy book with personality by incorporating unique details. Include family recipes, cherished sayings, or even scanned childhood drawings to create a warm and meaningful keepsake.
Stories are the heart of any genealogy book. Share pivotal moments from each person’s life—marriages, major achievements, or challenges they overcame. These narratives bring your ancestors to life, transforming names into relatable, dynamic individuals.
High-quality visuals can elevate your book’s impact. To ensure your images look their best, explore top photo scanning options for digitizing old photos, slides, and negatives. Clear, professional images will enhance your family’s story and create a visually stunning project.
Printing and Assembling the Book
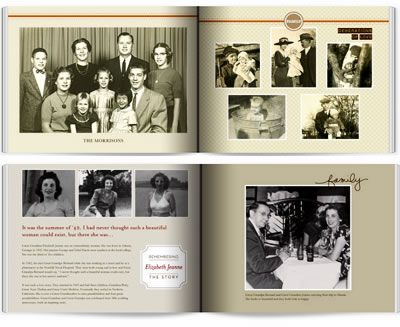
Once your content is organized, decide on the format. A printed hardcover book offers a timeless, polished look, while a scrapbook-style format allows for a more hands-on, creative approach. For tech-savvy families, a digital version might be the most convenient option.
For printed books, many online services provide customizable templates that help you design a professional layout. Alternatively, if you prefer a DIY approach, craft your book by hand using materials like vintage-style paper, decorative elements, and handwritten notes.
Conclusion
Creating a DIY genealogy book is a deeply personal and rewarding project that celebrates your family’s unique history. By collecting cherished stories, organizing them thoughtfully, and adding meaningful touches, you’ll craft a gift that transcends time.
With tools like photo digitization and professional scanning services at your disposal, preserving and showcasing your family’s legacy has never been easier. Start your project today, and give your loved ones a beautiful piece of their history to treasure forever.


